This tutorial is Lesson 2 of our 10 Part series of Photoshop Tutorials. Click here to read Lesson 1 – Introduction to Photoshop.
Layers
‘Layers’ is a revolutionary concept that has made the workflow in Photoshop really easy and uncomplicated. Introduced in 1995, this concept became a huge success. This meant that all the other major raster graphics software took this idea and added it to their respective applications.
Adobe Photoshop 3.0 was the one that came with this outstanding feature and made image editing fun and exciting. This feature allows you to add new elements to an image. The addition takes place in a non-destructive way, i.e without altering the original image. They are basically images stacked over one another like sheets of paper… where the sheets are transparent. Moreover, these layers can contain images, text, objects, videos, 3D models, Adjustment effects, and Vectors.
This is such a salient feature in the workflow that it has a permanent spot in the default workspace. Usually present on the bottom right of the layout, and has a full panel dedicated to itself.

Layer’s Panel

You can open this panel if you are not already present in your settings. Click on Windows(top menu) > Layer, or press F7 as the keyboard shortcut. This will open the panel as shown above.
Photoshop allows great versatility with layers using the layers panel. The reason why that is because one can place elements on separate layers. Also because adding, deleting or rearrange objects within layers is really easy and highly editable. In addition to all that, you can also adjust the opacity or transparency components on the layers too. The user also has full control of the way each layer interacts with another using the blending modes.
Following are all the buttons present in the layers panel:

Blending Modes
‘Blending modes’ are used when determining how two layers will interact with one another. The ‘Opacity’ and ‘Fill’ options are used hand in hand with the blend modes. The option for blend modes is by default present at number two from the top left in the panel box. What’s more, is that when clicked it will open a drop-down menu with approximately 27 different types of options. 19 out of the 27 Blending Modes behave the same way when Fill is adjusted. This shows opacity plays a significant role in mixing up different elements. However, eight Blending Modes give you a different result when Fill is changed compared to the changes in the Opacity. Shown below is the list of all the blending options present in the software.

How to Blend Modes Work?
The ‘blend modes’ grant users the freedom to choose how they want their image to interact with the layer(s) underneath. All different blend modes use different mathematical calculations. When applied to layers, it produces different outputs for colour, saturation, luminosity and more. Furthermore, changes made using blend modes are parametric. This means that the changes are non-destructive and one can always revisit your blend mode settings and readjust them as needed. No damage to the pixels will take place in the original image. Nonetheless, they are a crucial part of Photoshop and each has its individual role. So, let’s talk about each one of them in brief, to understand them a bit better!
The layer which is selected for the effect is called the ‘Blend Layer’ whereas the layer underneath it, is the base layer.
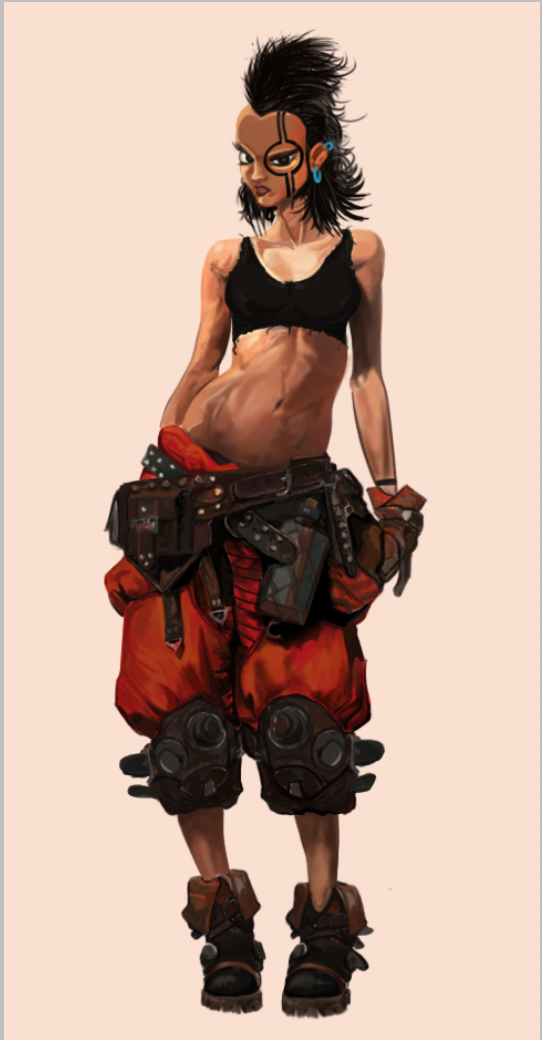
NORMAL – Keyboard shortcut ( Shift+option/alt+N )
This is the most basic blend mode and uses the top layer only. No mixing of colors takes place with the bottom layer(s) or any algorithms applied which bend pixels. Hence the output is just an addition of the object to the original image with no special effects. The ‘Normal’ mode set in the default settings of Photoshop.

This is what an image looks like with the normal mode.
DISSOLVE – Keyboard shortcut ( Shift+Option/alt+I )
The Dissolve Blending Mode also does not blend pixels like the normal mode. This mode only reveals the pixels of the underneath layer and acts on transparent and partially transparent pixels. The pixels below are revealed through a dither pattern (noise) whose intensity is based on the Opacity of the blending layer.

DARKEN – Keyboard Shortcut ( Shift+Option/alt+K )
This Blending Mode also does not blend pixels and only compares the base or blend colors by checking the luminance value of each RGB channel. It keeps the darkest of the two colors, and pixels lighter than the blend color are replaced, and pixels darker than the blend color do not change.
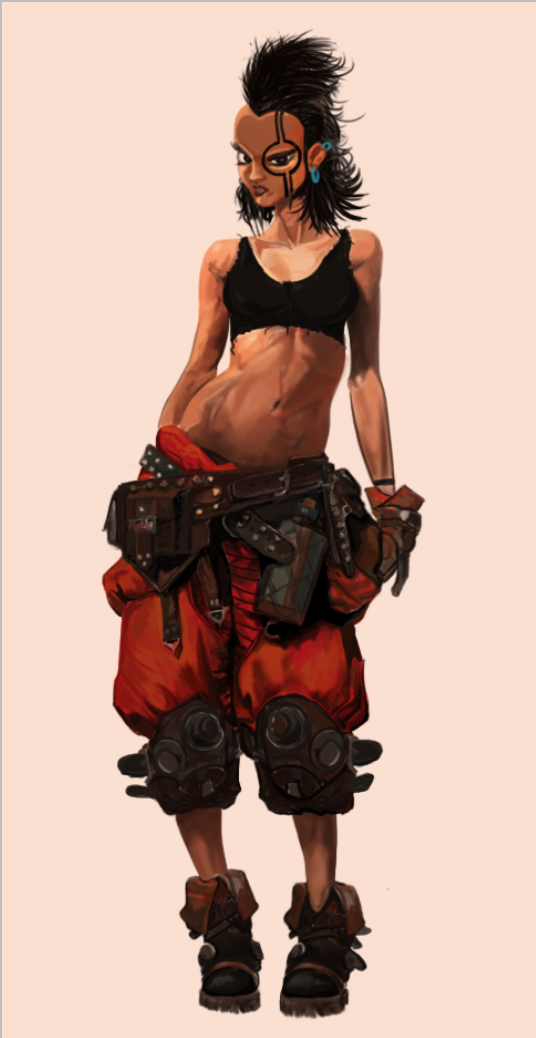
MULTIPLY – Keyboard Shortcut ( Shift+Option/Alt+M )
Multiply is one of the most used Blending Modes in Photoshop. This Blending Mode multiplies the luminosity of the base color by that of the blend color. The resulting color is always a darker color whereas white produces no change the black pixels remain. In addition to that, it can also produce contrasting levels of darkening which ultimately depends on the luminosity levels of the base layer. This is an excellent blending mode for darkening images and creating shadows.
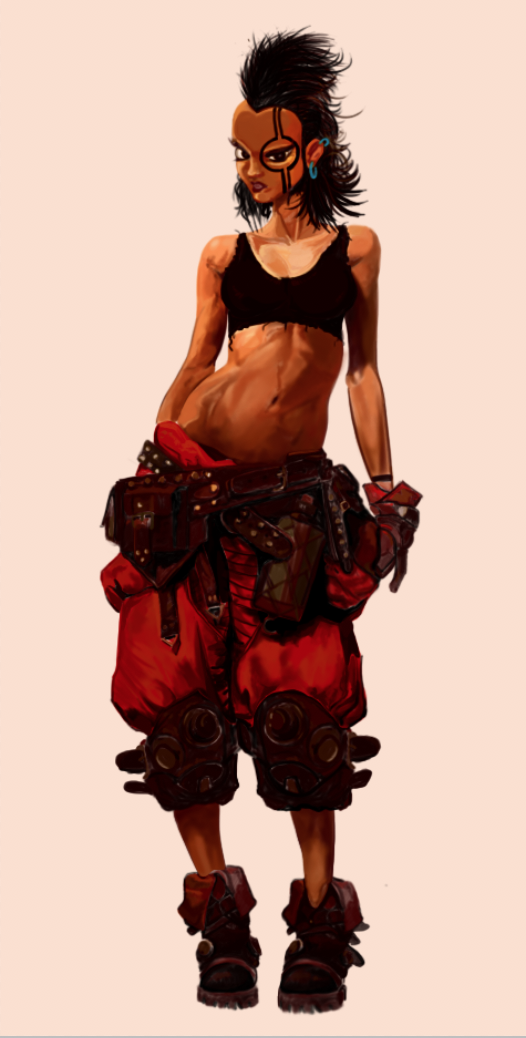
COLOR BURN – Keyboard Shortcut ( Shift+Option/Alt+B )
Color Burn is one of the eight unique Blending Modes in Photoshop that react in a different way, when the Opacity is adjusted as compared to Fill of the layer. The Color Burn Blending Mode can give you a much darker result than Multiply blending mode if both the layers are of dark color. This mode works by increasing the contrast between the base and the blend colors resulting in more highly saturated mid-tones and reduced highlights type of image. The result of the output is very similar to the effect one would get, if the Burn Tool is used to darken an image.

LINEAR BURN – Keyboard Shortcut ( Shift+Option/Alt+A )
This blending mode decreases the brightness of the base color (of the targeted layer) and enhances the color of the lower layer. The calculation of how much color to blend is done in proportion to the values of the blend colors on the layer. It looks at the color information in each RGB channel and darkens the base color to reflect the lower layer.
DARKER COLOR
This color blending mode is really similar to the ‘Darken’ blending Mode. Similar to that one it does not blend pixels but instead compares the base and the blend colors of the respective layers. In comparison, it figures out the darker color of the two layers and keeps the darker one of the two. The only difference between the two is that ‘Darker Color’ looks at the composite of all the RGB channels, whereas ‘Darken’ looks at each RGB channel individually to come up with a final blend.

LIGHTEN – Keyboard Shortcut ( Shift+Option/Alt+G )
Contrary to the darken blending modes, the lighting blending mode takes a look at the base color and blend color, and it keeps whichever one of the two is the lightest. Similarly to Darken Blending Mode, Lighten analysis the three RGB channels separately when blending the pixels. This produces light and sometimes transparent results. Identical colors produces no change.

SCREEN – Keyboard Shortcut ( Shift+Option/alt+S )
The screen is yet another one of Photoshop’s most popular Blending Modes. The resulting color of this blend mode is always a brighter color whereas, Black produces no change. The brighter pixels all remain became transparent. The ‘screen’ can produce many different levels of brightening depending on the luminosity values of the blend layer, making Screen, a very efficient Blending Mode for brightening of images, or for creating highlights.

COLOR DODGE – Keyboard Shortcut ( Shift+Option/Alt+D )
This blending mode looks at the color information in each channel and brightens the base color to reflect the blend color. In the process, the contrast is decreased between the two layers. Blending with black produces no change. Therefore, The Color Dodge Blending Mode gives you a brighter effect than Screen. Also, the result usually has saturated mid-tones and blown highlights.

LINEAR DODGE (ADD) – Keyboard Shortcut ( Shift+Option/Alt+W )
Linear Dodge (Add) produces similar but stronger results than Screen or Color Dodge. This Blending Mode looks at the color information in each channel and brightens the base color to reflect the blend color by increasing the brightness instead of highlights. In addition to that this effect also blends differently when Fill is adjusted, compared to when Opacity is adjusted.

LIGHTER COLOR
Lighter Color is a contrary effect to ‘Darken Color’. But at the same time is very similar to Lighten. This Blending Mode does not blend pixels. It only compares the base and ‘blend’ colors, keeps the brightest of the two. The difference between the two is that Lighter Color looks at the composite of all the RGB channels, whereas Lighten looks at each RGB channel to come up with a final blend of colors. It also produces transparent effect if the bottom layer is of lighter color. This is because, the pixel with lighten and let light pass though them perfectly.

OVERLAY – Keyboard Shortcut ( Shift+Option/Alt+O )
In my personal opinion, Overlay is Photoshop’s most used blend mode. It is a combination of Multiply and Screen modes, and this effect produces light and alters saturation. This mode always lets the lower layer to shine through and add the object(s) in a well-balanced manner. The overlay is applied at half the strength on lighter colors which are generally less than 50% gray. 50% gray itself becomes transparent. The major difference between this Blending Mode and the other Contrast Blending Modes is, it makes its calculations by taking the brightness of the base layer in to account. Contary to this, all of the other Contrast Blending Modes calculate the strength based on the brightness of the blend layer.

SOFT LIGHT – Keyboard Shortcut ( Shift+Option/Alt+F )
This effect is similar to shining a diffused spotlight on the image. If the blend color is less on the gray side ( Lesser than 50%), the image is lightened as if the dodged effect is applied. But If the blend color is more on the darker side ( Greater than 50% ), the image is darkened as if it has being burned with the burn tool. Soft light applies either a darkening or lightening effect depending on the luminance values of the respective layers. This mode can also be thought of as a lighter version of Overlay, i.e without the extra contrast.

HARD LIGHT – Keyboard Shortcut ( Shift+Option/Alt+H )
Hard Light is a mixture of Multiply and Screen Blending Modes. The brightness of the blend layer is used to make the calculations regarding the output of the ‘mode’. It usually produces harsh results and often needs adjustment to the opacity or fill options to get better results. This is generally useful for adding highlights to an image.

VIVID LIGHT – Keyboard Shortcut ( Shift+Option/alt+V )
One can portray Vivid Light as an extreme version of Overlay and Soft Light. Anything which is darker than 50% gray is darkened further, and anything lighter than 50% gray is Lighten more. This ‘mode’ also produces harsh results with more saturation and contrast, and often need adjustments to its opacity values.

LINEAR LIGHT – Keyboard Shortcut ( Shift+Option/alt+J )
This mode Burns or dodges the colors by decreasing or increasing the brightness of the layers. This variation depends on the blend colors and usually produces sharp results. For this reason, it could also be said that the Linear Light uses a combination of the Linear Dodge Blending on lighter pixels and a Linear Burn on darker pixels.

PIN LIGHT – Keyboard Shortcut ( Shift+Option/alt+Z )
Pin Light is an extreme Blending Mode. This effect that a Darkening and Lightening effect simultaneously, resulting in harsh patches and blotches of color. Moreover, it also completely removes mid-tones in the blend layer. This tool is really useful in adding special effects to the files.

HARD MIX – Keyboard Shortcut ( Shift+Option/Alt+L)
This also an extreme blending mode. It adds the red, green, and blue channel values of the blend color to the RGB values of the base color. The resulting image loses a lot of detail, and the colors can only be black, white, or any of the six primary colors. Red, green, blue, cyan, magenta, or yellow. This is also very useful in adding special effects.

DIFFERENCE – Keyboard Shortcut ( Shift+Option/Alt+E )
Difference Blending Modes uses the difference in the base layer and the blend layer pixels. This difference is used to produce the resulting blend. The output at many times looks like one of those traditional negatives of the photographs. This blending mode can be extremely useful for alignment. Layers with similar content can be easily aligned with this tool.

EXCLUSION – Keyboard Shortcut ( Shift+Option/Alt+X )
This blend mode creates an effect similar to but slightly lower in contrast and brightness than the Difference blending mode. Exclusion is also used in creating special effects and to align the image.

SUBTRACT
The Subtract Blending Mode is a harsher version of the exclusion one. It subtracts the pixel values from the base layer completely and leave a gap in the pixel volume. This Blending Mode also drastically darkens the pixels by subtracting brightness and increasing the contrast.

DIVIDE
Divide produces the opposite effect as Subtract. This effect alters the brightness levels of the respective layers. The blend layer is inversely proportional to the brightness levels of that particular layer. As a consequence, when the blend values get darker, the result gets brighter. Apart from this, Dark areas of the blend layer produce bright colors, while the light areas of the blend layer produced a very small change. This also creates a gap in the RGB level and is really useful in cutting out shapes from the artwork.

HUE – Keyboard Shortcut ( Shift+Option/Alt+U )
This blend mode creates a result color with the luminance and saturation of the base color and the hue of the blend color. Hue can be used to change hues in a layer while maintaining the tones and saturation of the original.

SATURATION – Keyboard Shortcut ( Shift+Option/Alt+T )
Unlike the hue, this Blending Mode preserves the luminosity and hue of the base layer and simultaneously adopting the saturation of the blend layer. Painting with this mode in an area with no saturation causes no change as there are no pixels with luminosity in it.

COLOR – Keyboard Shortcut ( Shift+Option/Alt+C )
The Color Blending Mode deals with the luminosity of the base layer. It preserves the luminosity while taking in the hue and saturation of the blend layer. If you apply the Color Blending Mode to the blend layer, you will get the same result, as when you apply the Luminosity Blending Mode to the Base layer, then reverse the order of the layers. Monochromatic images are colored using this blend mode.

LUMINIOSITY – Keyboard Shortcut ( Shift+Option/Alt+Y )
This mode is the inverse effect of the Color mode. Luminosity blending mode preserves the hue and saturation of the base layer and adopts the luminosity of the blend layer. Sometimes it can also create a grayscale image if the hue and saturation are below 50%.

The use and potential of blending modes are far and wide. These modes have made things so much easier in the workflow itself. They achieved results within seconds and are so easy to manipulate. However, I don’t recommend learning all of them, as they could sometimes turn confusing which beats the purpose of us learning them anyways. So just learnt the ones which u most often use or the most popular ones. This will make learning and practicing so much more fun!
Any Doubts?
Leave a comment below, and we will answer all your queries.
Ready for Next Lesson?
I hope you got enough information about Blending modes from this tutorial. Our next lesson will focus on Selection Tools available in Photoshop.